SAFETY PRECAUTIONS
>
• Read and carefully follow the operating instructions and safety precautions for the press,
pump, and cylinder. Most problems are caused by incorrect assembly or operation.
• The owner of the press must ensure the press is installed and operated according to Federal (OSHA), state, and local safety standards.
• A press can exert an extremely high force at a moderate hydraulic pump pressure. If you have any questions about how much force is exerted at a given pressure, contact the Technical Services Department.
• This press is designed for shop maintenance applications. For use in other applications, contact Technical Services.
OPERATION
• Wear eye protection that meets the standards of ANSI Z87.1 and OSHA. Keep hands away from the work area. The press should be located in an isolated area or shielded to minimize danger to others. Hydraulic pressure can cause materials to break, possibly resulting in personal injury.
• It is impossible for the manufacturer to provide practical, all-purpose shielding because this is a general purpose press used in many different applications. The owner of the press must supply shielding (such as the 1230PB or 2036PB available through OTC) that is practical and specific for a particular application.
• A work piece must be well supported and aligned to prevent slippage and breakage.
• To prevent accidental slippage, do not place work piece on the press bed or apply hydraulic force until all bolster pins are in place and all tension has been removed from the bolster lift cables.
• Do not stress adapters beyond their capacities. Pushing or pulling adapters used with this press must have a maximum tonnage rating equal to, or greater than, the maximum tonnage rating of the press. Otherwise, breakage may occur.
• The user must ensure all safety-related decals are installed, maintained, and replaced when necessary
BOLSTER ADJUSTMENT: A winch and cable assembly support the bolster when the bolster support pins are not in place.
• To prevent accidental slippage, all bolster support pins must be in place and all cables slack before a hydraulic pressing operation is performed.
• Keep hands, feet, legs, etc. out from under the bolster to prevent personal injury.
• To prevent accidental cable breakage, never raise or lower the bolster when under a load.
• When raising or lowering the bolster, place a support pin all the way through the front and back uprights in the highest hole under the bolster. Ensure the pin does not interfere with the position of the new bolster. To prevent injury, keep your hands free of the pins once the pins are in place.
• Inspect the entire length of each cable every three months. Replace any cable that is worn, frayed, or crushed. The cables must run easily along the pulleys, allowing the pulleys to turn freely.
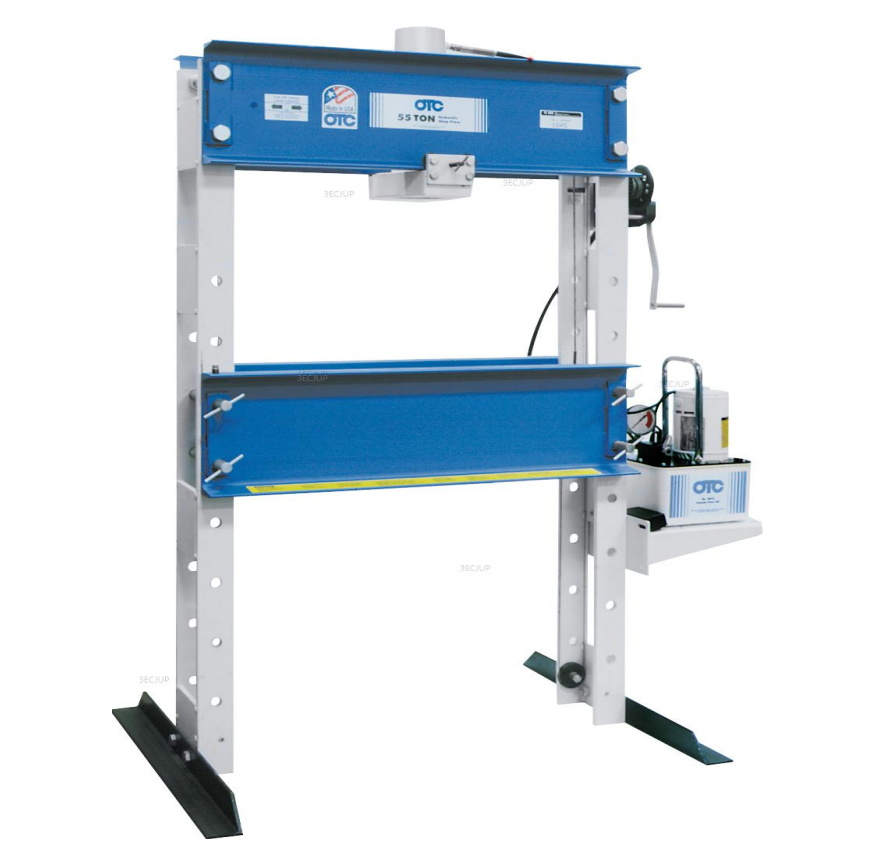
Operating Instructions
>
ASSEMBLY
Remove banding from press and shipping pallet. Then remove all cartons. Stand press upright. Refer to the following instructions and parts list provided.
1. Attach the feet to the press frame uprights with the fasteners noted on the parts list.
2. Remove the lock ring and spring from the winch shaft. Place winch handle onto shaft. Then reassemble the lock ring and spring.
3. Using the fasteners noted on the parts list, attach the pump to the pump mounting bracket. See Figures 1 through 3.
NOTE: If your pump is a model 4044 or PE172, remove the handle from the pump to allow clearance for the shop press winch handle.
4. Cleanthethreadsonthefittingsandonthehydraulic hose. Assemble the hose to the pump. Thread the other end of the hose into the cylinder
IMPORTANT: Seal hydraulic connections with pipe sealant. Teflon tape may also be used to seal hydraulic connections, if only ONE layer of tape is used. Apply the tape carefully to prevent it from being pinched by the fitting and broken off inside the pipe end. Loose pieces of tape could travel through the system, obstructing the flow of oil or jamming precision-fit parts.
5. Air can accumulate in the hydraulic system during initial setup or after prolonged use causing the cylinder to respond slowly or in an unstable manner. To remove the air, lay the cylinder on the floor. Then extend and retract the cylinder several times without putting a load on the system. Trapped air will release through the pump reservoir.
6. Position the work bed:
A. Put a small amount of tension on the cable by cranking the winch up, taking weight off the pins. This frees the pins in the end of the bolster next to the winch (or right side of the press). Then pull out the loose pins.
B. Raise the other end of the bolster by pulling slightly on the handle until the remaining two pins are free.
C. Crank the winch for either up or down movement of the work bed. Reassemble the pins.
CAUTION: The winch has a special friction break for holding the bolster during positioning. The friction break is NOT designed to hold during a pressing operation nor will it hold a workload during position.
CYLINDER ATTACHMENT
25 TON PRESS
1. Remove the adjusting screw from the cylinder mounting plate. Slip the two roll pins on the mounting plate over the back lip on the bottom of the upper bolster.
2. Slide the mounting plate to the right side (winch side) of the press until the front roll pin lines up with the notch on the front of the upper bolster. Raise the plate until the roll pin clears the lip on the bolster and slide the mounting plate to the left.
3. Reinstall the adjusting screw in the mounting plate.
4. Disassemble the hose from the cylinder. Plug the cylinder and the end of the hose.
5. Thread the cylinder into the mounting plate. Position the cylinder so the hose fitting on the cylinder points to the side of the press where the pump is mounted.
WARNING: To prevent personal injury, the cylinder and mounting plate MUST have maximum thread engagement to prevent the threads from stripping while the press is under a full load.
6. Re-thread the hose back into the cylinder fitting, using pipe sealant or Teflon tape.
55 TON PRESS
1. Disassemble the hose from the cylinder. Plug the cylinder and the end of the hose.
2. Thread the cylinder into the mounting plate. Position the cylinder so the hose fitting on the cylinder points to the side of the press where the pump is mounted. NOTE: The cylinder handle must not interfere with the winch cable after the cylinder is installed
WARNING: To help prevent personal injury, the cylinder and mounting plate MUST have maximum thread engagement to prevent the threads from stripping while the press is under a full load.
3. Due to the weight of the mounting plate and cylinder, the lower bolster can be used with cribbing to raise the mounting plate and cylinder to the top bolster. CAUTION: The lower bolster should be used in this manner only during the assembly of the press because raising and lowering the bolster with a load can cause cable breakage.
4. Build two roller assemblies by installing the adjusting screw, rollers, bushings, and hardware onto the roller plates.
5. Attach the cylinder/mounting plate assembly to the upper bolster by installing the roller assemblies to the mounting plate.
6. Lower the bolster assembly and remove cribbing, if used. Insert bolster pins through lower bolster and uprights at desired height.
7. Re-thread the hose back into the cylinder fitting, using pipe sealant or Teflon tape
CAUTION: To prevent equipment damage.
• Retract the cylinder when not in use to protect the surface of the piston rod.
• When adding oil to the pump reservoir, use only a high-grade hydraulic oil. Never use brake fluid or other substitute.